How to Perform Friction Identification
NOTE
Before conducting friction identification, please consult technical support for confirmation
1. Safety Tips
- Clear the Workspace: During the identification process, the robotic arm will perform large-range movements at various speeds. Ensure there are no obstacles, personnel, or cable interference within the full reach of the arm.
- Remove End-Effector Loads: When performing friction identification, please remove all end-effectors and cables to ensure the robotic arm's end-flange is in a no-load state.
2. Preparation
- Set Payload to 0: In the "Settings-Motion-TCP" of UFACTORY Studio, set the payload weight and offsets to 0.
- Complete No-Load State: Remove all end-effectors and detach all external cables from the xArm tool end
- Set Mounting to Floor: In the "Coordinates" settings of UFACTORY Studio, set the Mounting to Floor (0°,0°). The robot arm must be installed horizontally.
- Enable the Arm: Ensure the robotic arm is in the Enabled state and there are no error codes.
- Confirm Space: Re-verify that the robotic arm's workspace is clear and open.
- Software Preparation: Download and extract the xarm-tool-gui
3. Operating Steps
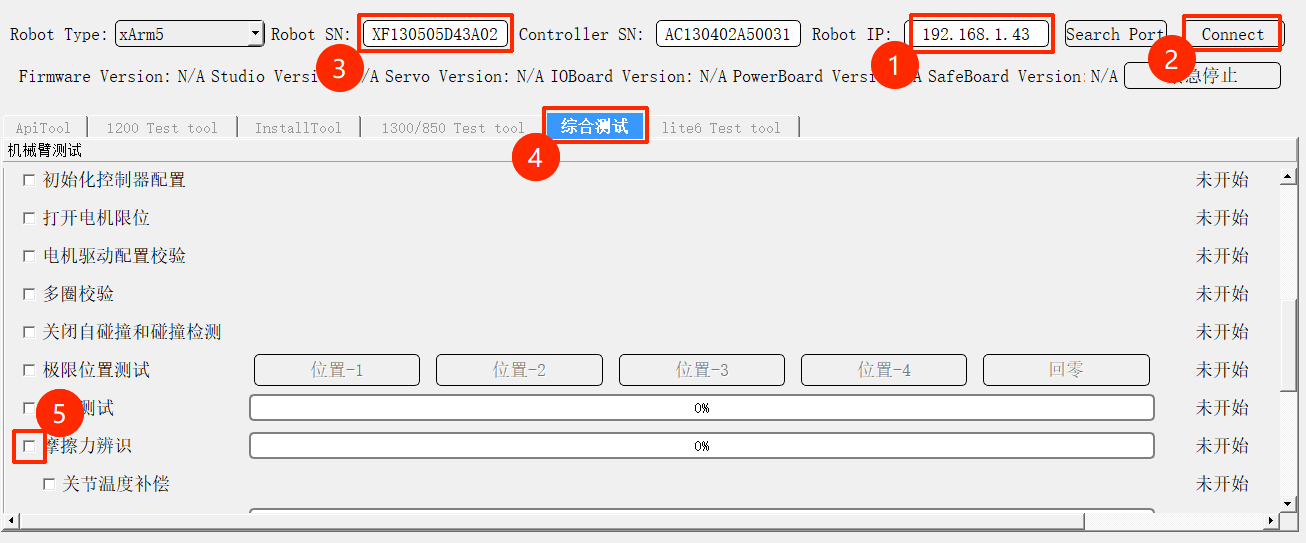
Run xarm-tool-gui.
Enter the controller IP address and click Connect.
Check if the Robot SN in the input box matches the SN on the base sticker. If they do not match, manually enter the base sticker SN into the input box.
Switch to the 【综合测试】 tab. Uncheck 【所有项目】 and check only 【摩擦力辨识】.
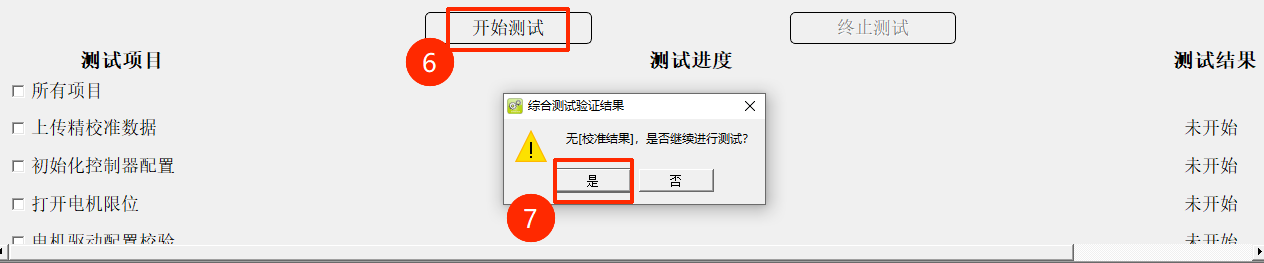
Click 【开始测试】. A confirmation box will appear. After re-confirming that the surrounding environment is safe, click 【是】.
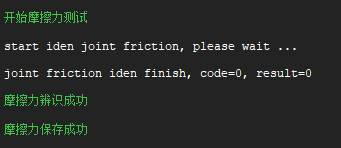
Once identification begins, the arm will move continuously for approximately 5 minutes.
Upon completion, the log area will display "joint friction iden finish" and "摩擦力辨识成功、摩擦力保存成功".
Press the E-Stop button and wait for 5 seconds → Release the E-Stop → enable the arm to complete the process.