How to reset the joint servo zero point?
Product: XF1304, XI1304, XS1304, UF 850
UFactory Studio: 2.4.0+
Please contact technical support<support@ufactory.cc>for confirmation before resetting; otherwise the warranty may be affected.
Preparation
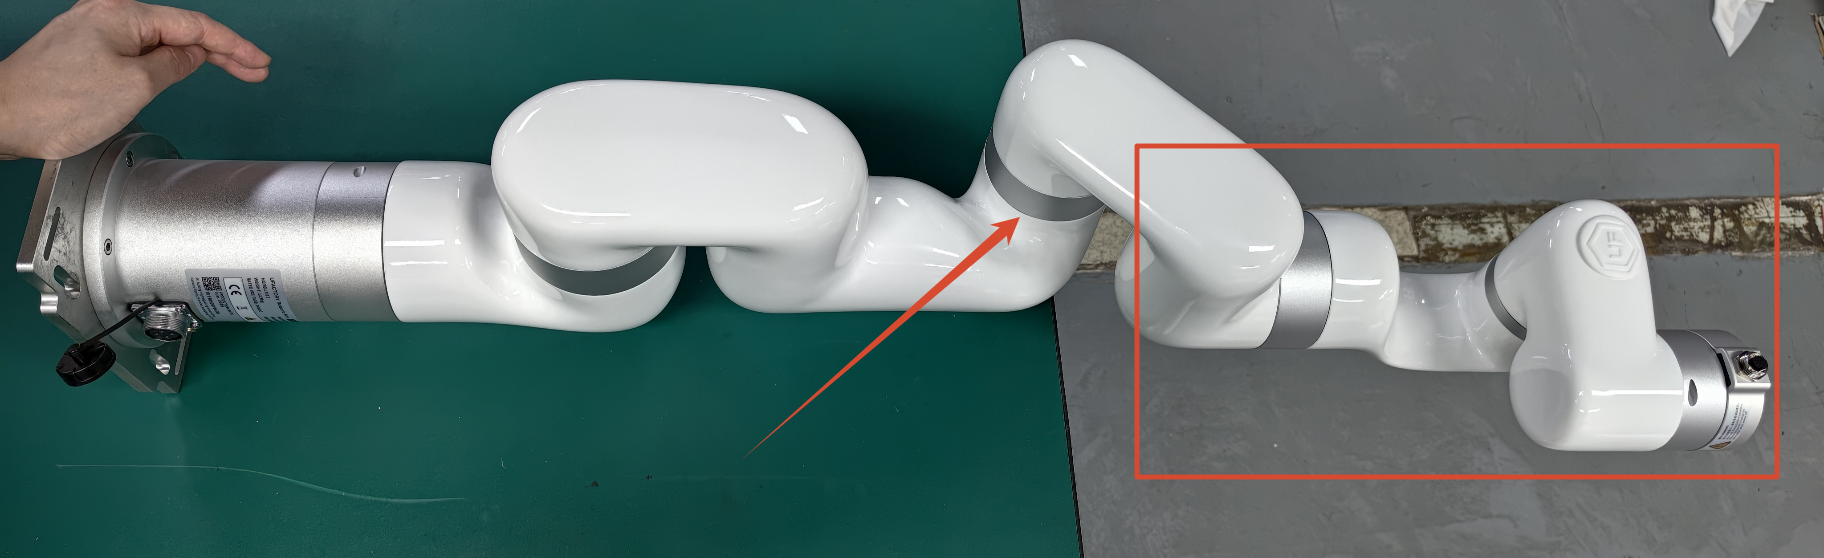
Joint3-xArm5/xArm6
- Move all the end effectors, and set TCP payload as 0.
- Place the arm horizontally on the table like the image below(J3 around -175 degree), make sure J4J5J6 is suspended, and 1 person to hold the arm to make sure it will not move.
Joint4-UF850
- Remove all the end effectors, and set TCP payload as 0.
- Move the arm back to zero position.
Joint4-xArm7
- Move all the end effectors, and set TCP payload as 0.
- Place the arm horizontally on the table like the image below(J4 around 175 degree), make sure J5J6J7 is suspended, and 1 person to hold the arm to make sure it will not move.

Reset command
- Press down the E stop button and release.
- Don't enable the robot. Send the servo reset command(Please reach to support@ufactory.cc> to get the command) via 'Settings-General-Debugging Tools-Joint', J* will move slightly, you will hear a sound like 'click' and J* don't move any more, indicating the reset process is over, then press down the E stop button and release.
- Reboot the entire system, and enable the robot.
- Unlock Joint * via 'Settings--General--Debugging Tools--Joint', move joint* to its original zero position, send
D13 I*, press down the E stop button and release to take effect, it will set the current position of Joint* as 0°.